
Exercitation ullamco laboris nis aliquip sed conseqrure dolorn repreh deris ptate velit ecepteur duis.
Exercitation ullamco laboris nis aliquip sed conseqrure dolorn repreh deris ptate velit ecepteur duis.
Call Our Support
+9198559-08009
Plot No. F-465, K&B Tower 2nd Floor,
Phase 8B, Mohali.
Working Hours ,
Mon to Sat: 9:30 am to 6:30 pm
MS Excel tutorial provides basic and advanced concepts of Excel. Our Excel tutorial is designed for beginners and professionals by keeping their requirements in mind.
Microsoft Excel is a computer application program written by Microsoft. It mainly comprises tabs, groups of commands, and worksheets. It stores the data in tabular form and allows the users to perform manipulation operations on them.
Our MS Excel tutorial will cover all topics from basic to advance, such as Introduction of MS Excel, worksheets, ribbon and tabs, functions, formula, MS Excel online, Excel VBA editor, data validations, conditional formatting, and more. Along with it, we will also show you the steps to download and activate MS Excel.
Microsoft Excel is an office use application designed by Microsoft. It comes with Office Suite with several other Microsoft applications, such as Word, Powerpoint, Access, Outlook, and OneNote, etc. It is supported in Windows as well as Mac operating system too
Microsoft Excel is one of the most suitable spreadsheet programs that help us to store and represent the data in tabular form, manage and manipulate data, create optically logical charts, and more. Excel provides you the worksheet to create a new document in it. You can save the Excel file with .xls extension.
A worksheet is made of rows and columns that intersect each other to form cells where data is entered. It is capable of performing multiple tasks like calculations, data analysis, and integrating data.
In Excel worksheet, rows are represented by numbers and columns by alphabets.
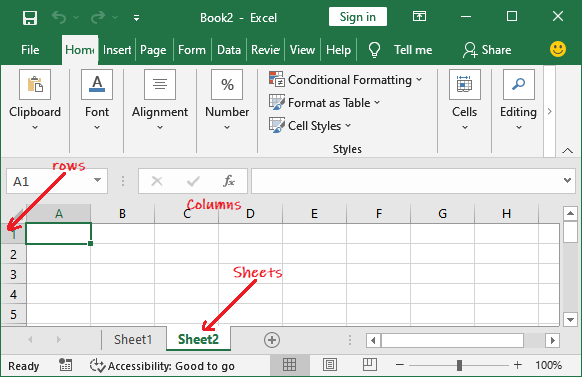
A single Excel workbook can consist of several sheets, named Sheet1, Sheet2, Sheet3… SheetN. You can add one or more sheets to your Excel document.
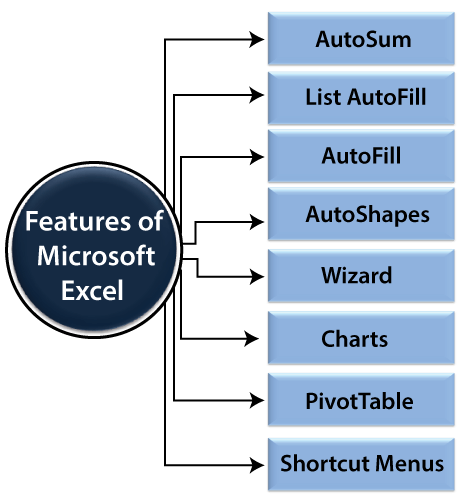
There are several features that are available in Excel to make our task more manageable. Some of the main features are:
In Windows 10 operating system, click on the Start button and search for the MS Excel application. If it is already installed in your system, it will appear here like this.
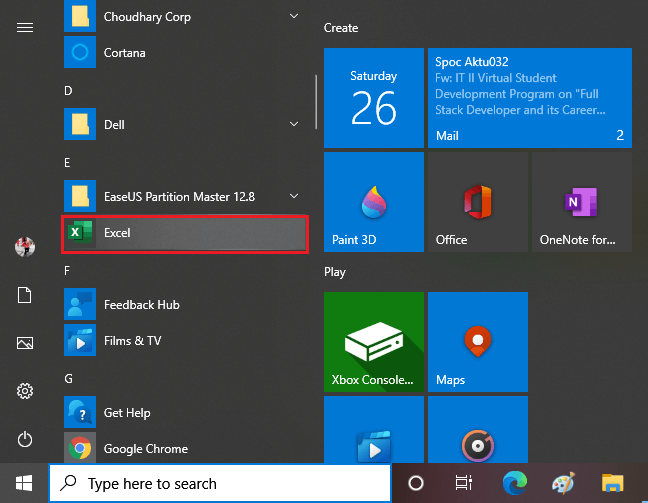
Double-tap on this icon to open the Excel.
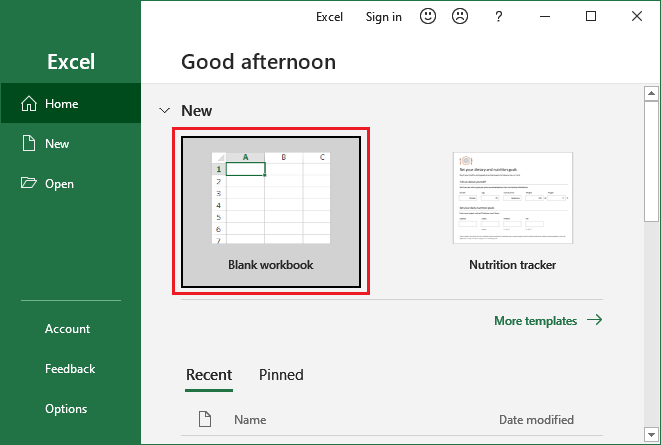
When the Excel opens, an interface will appear like this. From here, you can create a new workbook, choose a template, and access your recently edited workbooks.
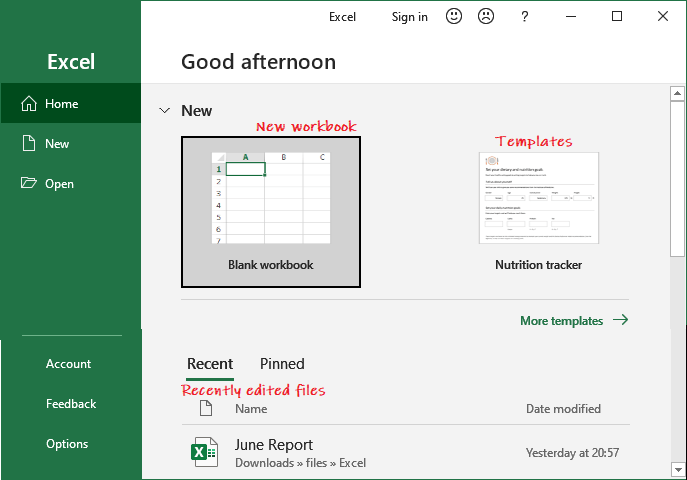
To create a new workbook, click on the Blank Workbook here.
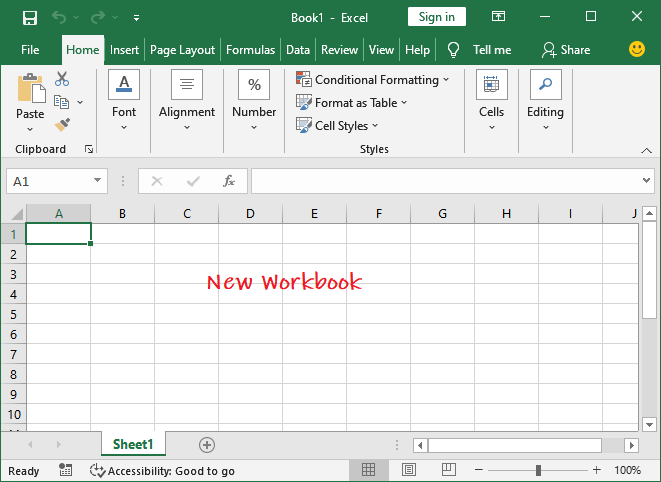
A blank Excel worksheet will open and display to you.
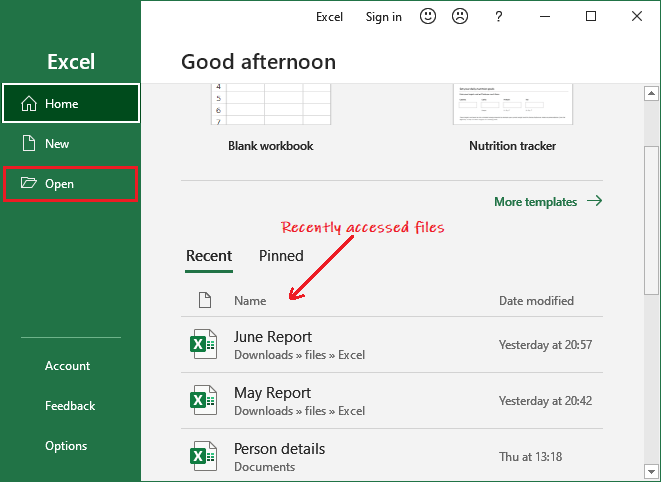
If you want to work with an existing workbook, you can either choose from the Recent list or click on the Open button to select from the specific location.
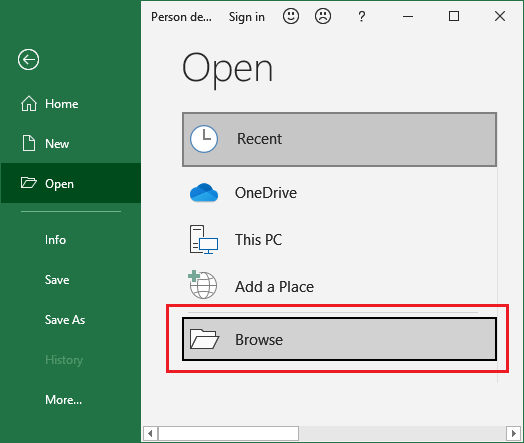
When you click the Open button, it will ask you to open the existing file from different locations, such as – Recent, OneDrive, This PC, and Browse.
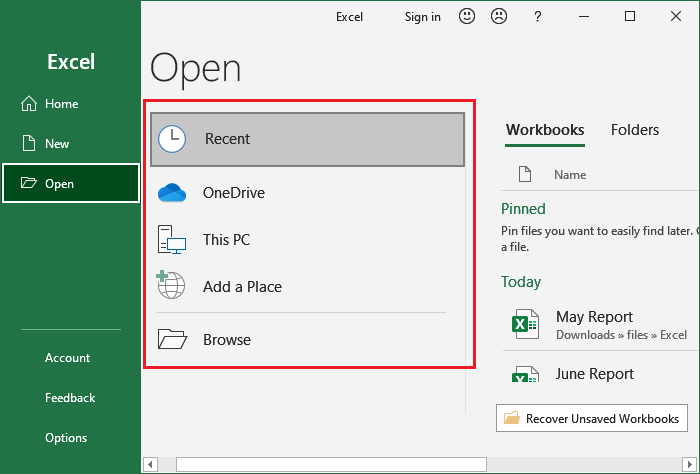
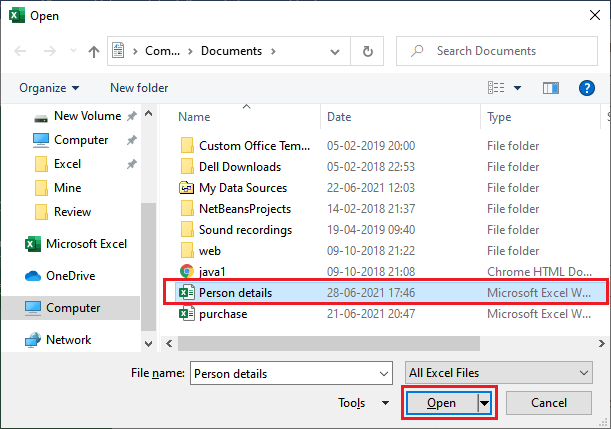
We will go for Browse this time; it will directly take you to the local computer location. From here, you can choose the Excel file you want to open.
Choose a file from your computer and click on the Open button.
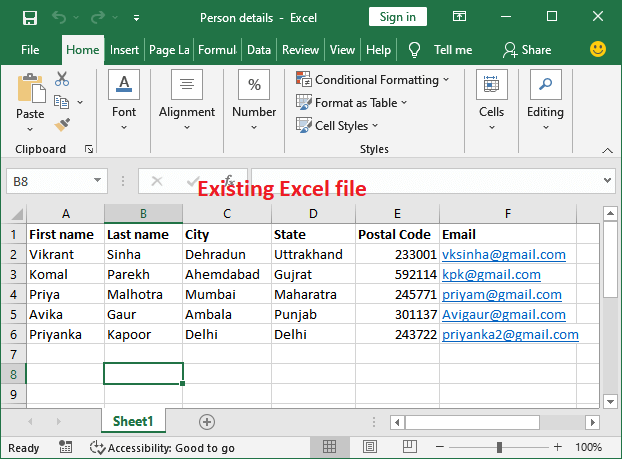
An existing Excel file that is stored on your local computer will open like this.
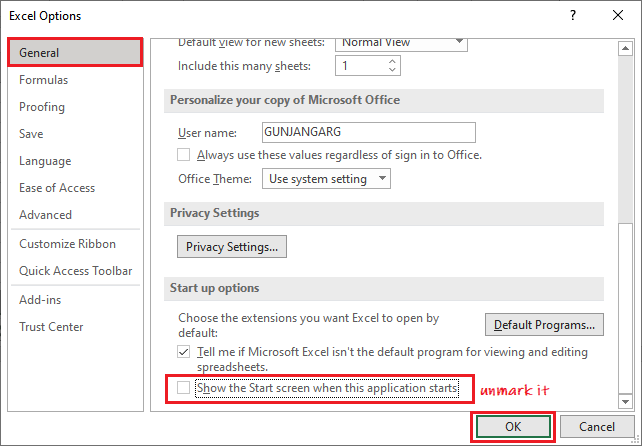
Setup the option to open the blank workbook automatically
In MS Excel, you can setup the option to open the blank Excel workbook by default whenever you start the Excel.
It is the main interface of an Excel worksheet, where we work and store our data. This interface contains various components. Before start working with Excel worksheet, you should be familiar with these components so that you can use the Excel application efficiently.
Once you get familiar with the Excel interface, you will able to identify the basic and most-used components of an Excel workbook. We have explained a bit about these components.
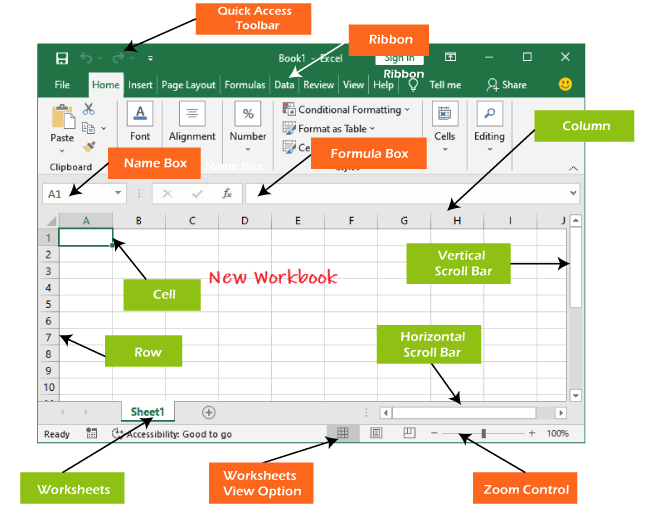
The Quick Access Toolbar contains some common and most used commands of Excel, which users repeatedly need while working with Excel. By default, Save, Undo, and Repeat commands are added in the quick access toolbar.
It provides fast access to its users by adding most-used commands in it. This quick access toolbar is customizable. It means you can add other commands, whichever you need most.
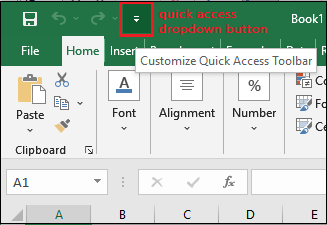
Add commands to the Quick Access toolbar
Step 1: Click on the drop-down arrow to the right of the Quick Access toolbar.
Step 2: Select the command you wish to add in the quick access toolbar from the drop-down menu.
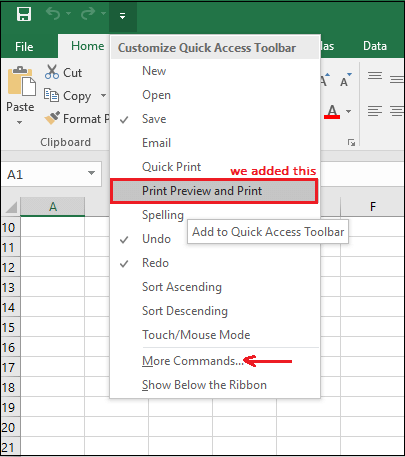
For more command, which is not available here, click on More Commands and choose from there.
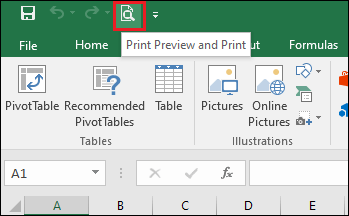
Step 3: Here, we have selected command Print Preview and Print that has been added to the Quick Access toolbar along with other commands. You can see it here.
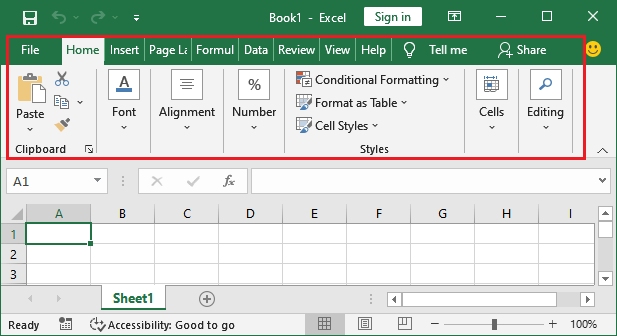
Excel 2016 utilizes a tabbed Ribbon system instead of traditional menus. The Ribbon includes multiple tabs, each with several groups of commands. We will use these tabs to perform the most common function in Excel.
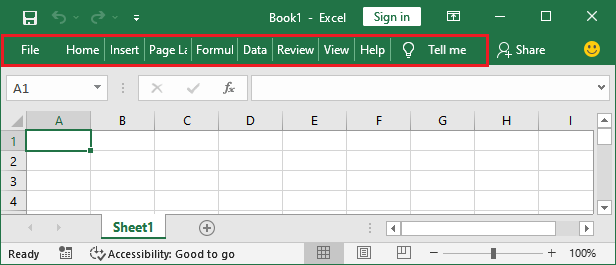
File, Home, Insert, Page Layout, Formula, Data, Review, View, and Help are the tabs consists by the Excel ribbon.
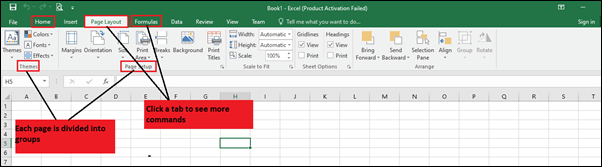
Each tab of Excel Ribbon contains its related operations list. For example, the formula tab contains all the mathematical, logical, text, string, finance, Date, and time functions.
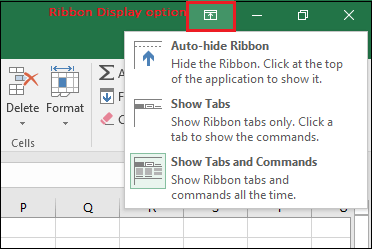
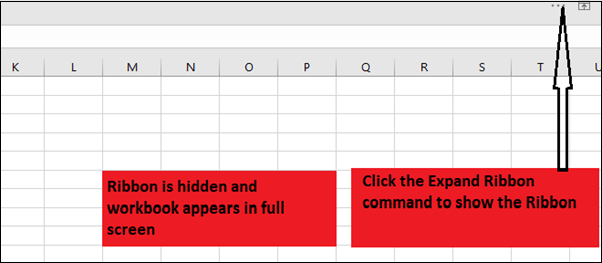
To minimize and maximize the Ribbon
The Ribbon is designed to respond to our current function, but we can choose to minimize it if we find that it takes up too much screen space.
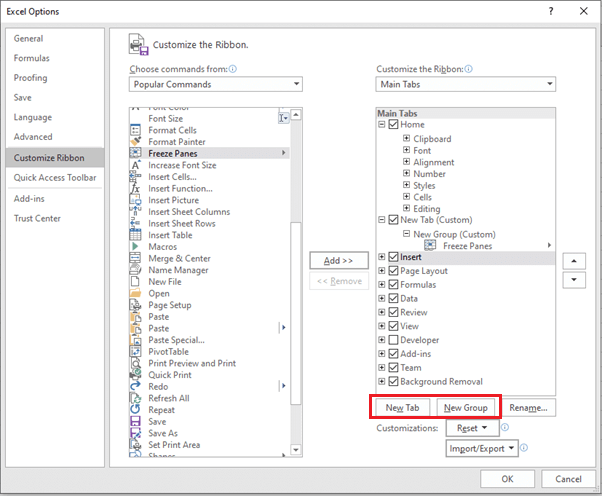
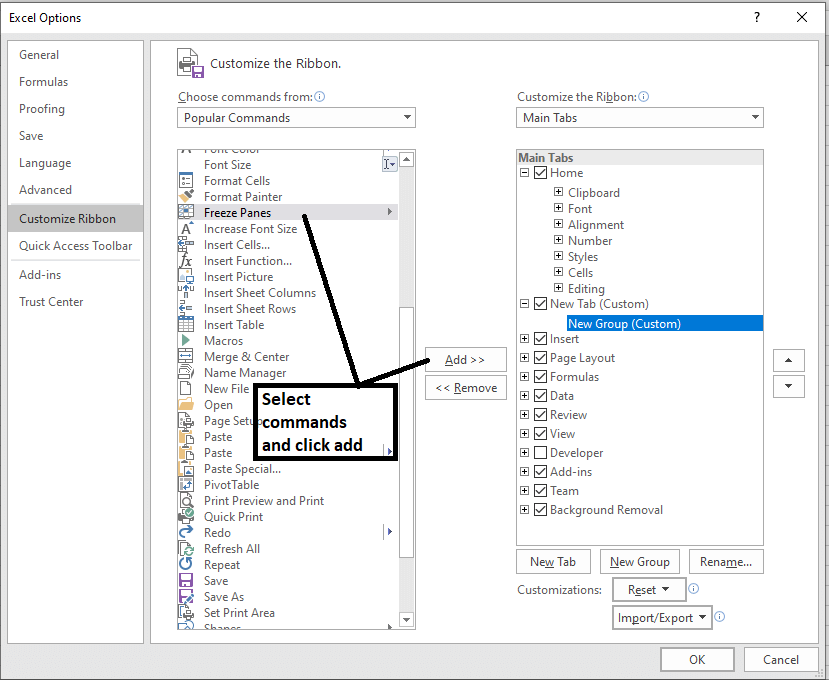
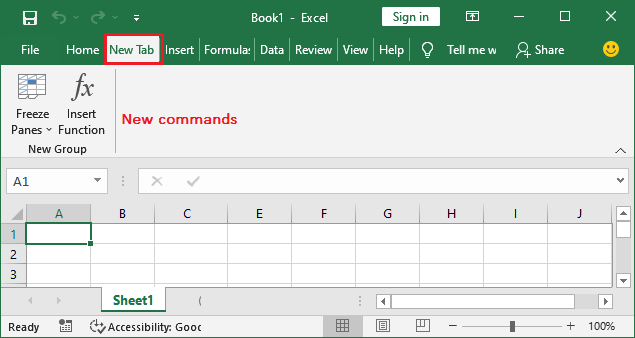
We can customize the Ribbon by creating our own tabs with whichever commands we want. Commands are always housed within a group, and we can create as many groups as we want to keep our tab organized. If we want, we can even add commands to any of the default tabs, as long as we create a custom group in the tab.
If we want, we can even add commands to any of the default tabs, as long as we create a custom group in the tab.

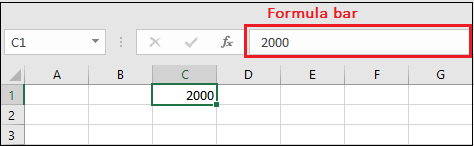
In the formula bar, we can enter or edit data, a formula, or a function that will occur in a specific cell. It allows to write the function and formulas to manipulate the data.
In the image below, cell C1 is selected, and 2000 is entered into the formula bar. Note how the data contains in both the formula bar and in cell C1.
The Name box presents the location or “name” of a selected cell.
In the image below, cell B4 is selected. Noted that cell B4 is where column B and row 4 intersect.

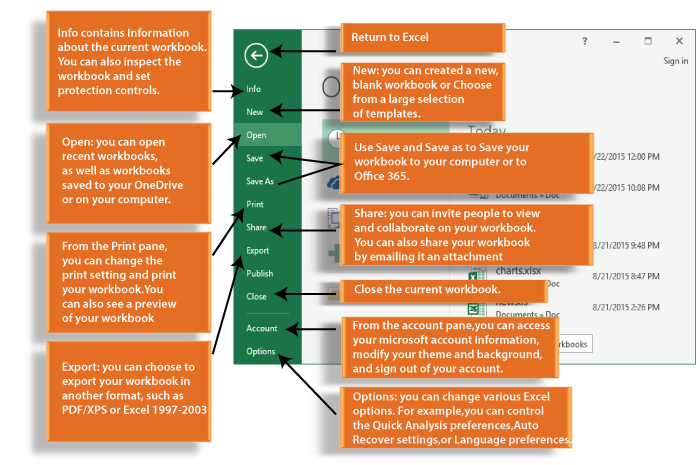
Click the File tab on the Ribbon. The Backstage view will emerge.

It is the backstage view of MS Excel and information about the options it contains.
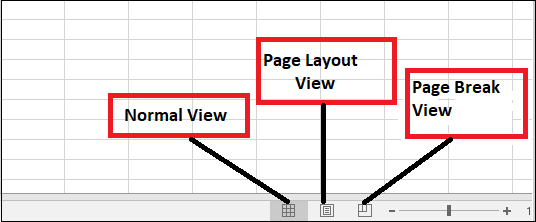
Excel 2016 has a variety of displaying options that change how our workbook is showed. We can choose to view any workbook in the Normal view, Page Layout view, or Page Break view. These views can be useful for several tasks, especially if we’re planning to print the spreadsheet.
To change the worksheet views, locate and choose the desired worksheet view command in the bottom-right corner of the Excel window.
To use a Zoom control, click and drag the slider. The number to the right of the slider reverse the zoom percentage. It presents at the bottom right corner of the Excel worksheet.
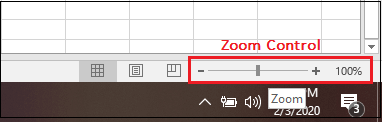
By default, Excel view zoom percent is 100%.


